Product Guide
How to Share and Customize Your Photography Gallery in Samaro: A Step-by-Step Guide
If you want to share and customize your photography gallery in Samaro, this guide walks you through every step. Samaro gives photographers granular control over who sees each gallery, how secure it is, and how polished it looks and this walkthrough covers the full process end to end, with real screenshots from the live dashboard.,
Watch the full video below for a complete, detailed walkthrough of every step.
Step 1: Log In and Find Your Event

When you log into Samaro, you land on a dashboard listing every event you’ve created, filterable by join date, guest count, or event name.
Step 2: Open the Sharing Tab

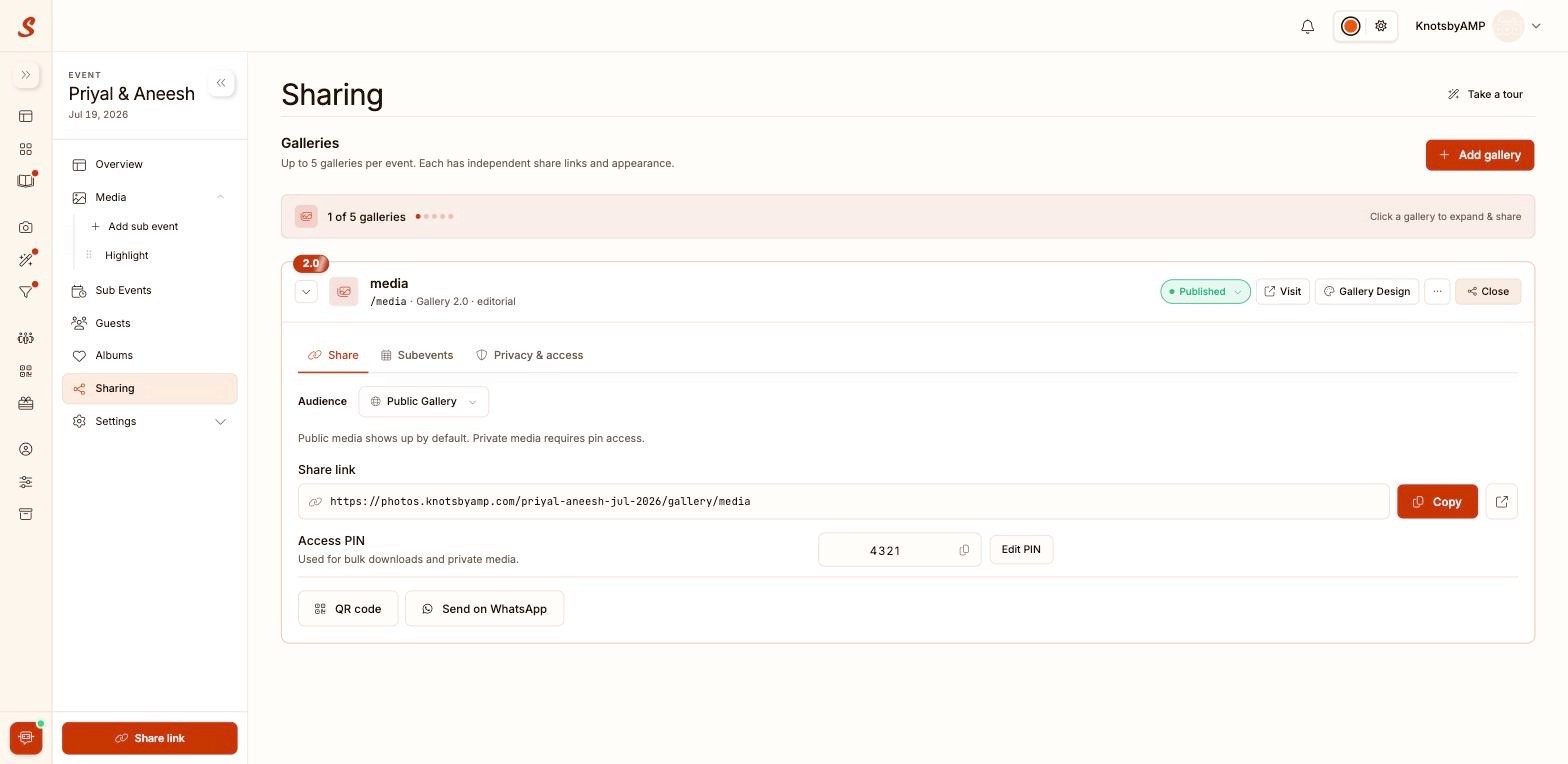
On the left-hand side of the event page, click Sharing. This opens the gallery management panel, which shows you’re in gallery 1 of up to 5 possible galleries per event, each with independent links and appearance settings. Click the Audience dropdown to see the four sharing modes: Public Gallery, Private Guest Access, All Access Gallery, and Mobile App.
Step 3: Generate and Distribute Your Link
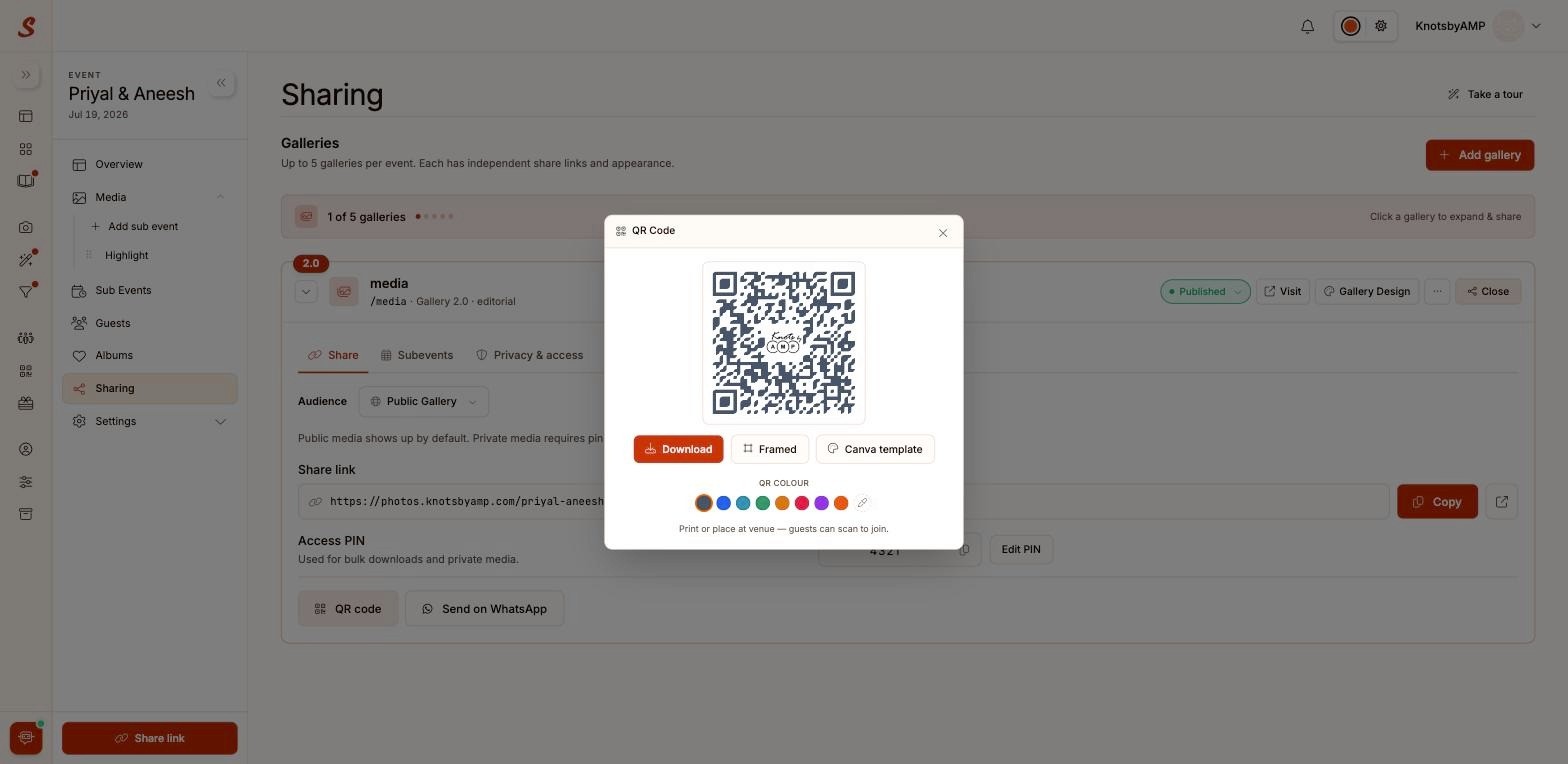
Click QR code to open the sharing modal, where you can download the code, apply a frame, open a Canva template, or recolor the QR pattern to match your brand. Use Send on WhatsApp (next to the QR code button) to push the link directly to selected contacts.
Step 4: Configure Subevents
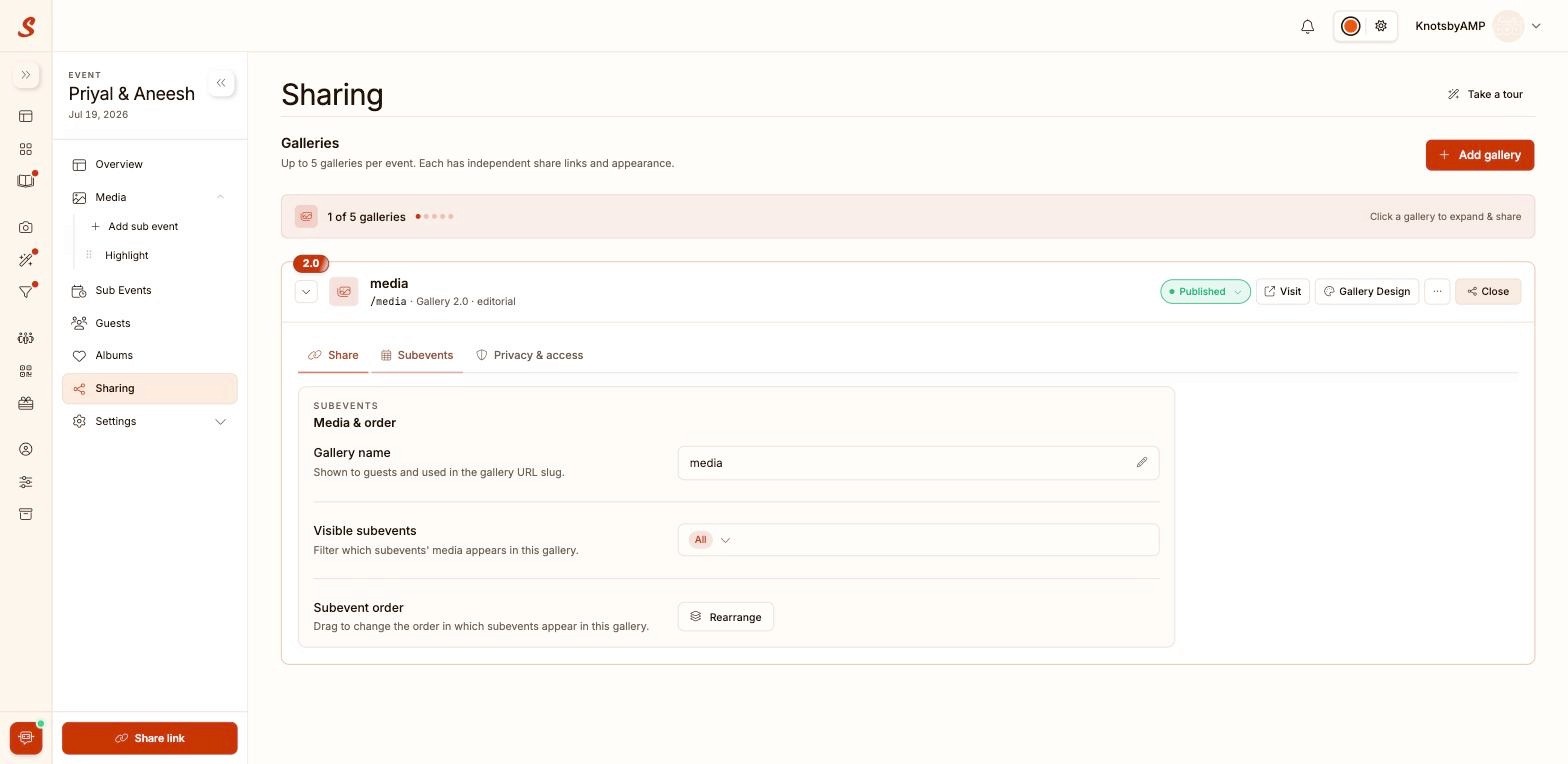
Click the Subevents tab to rename the gallery, filter which subevents’ media appears in it, and reorder subevents via the Rearrange tool, useful for building day-specific or combined galleries.


Step 5: Set Up Privacy and Access Controls
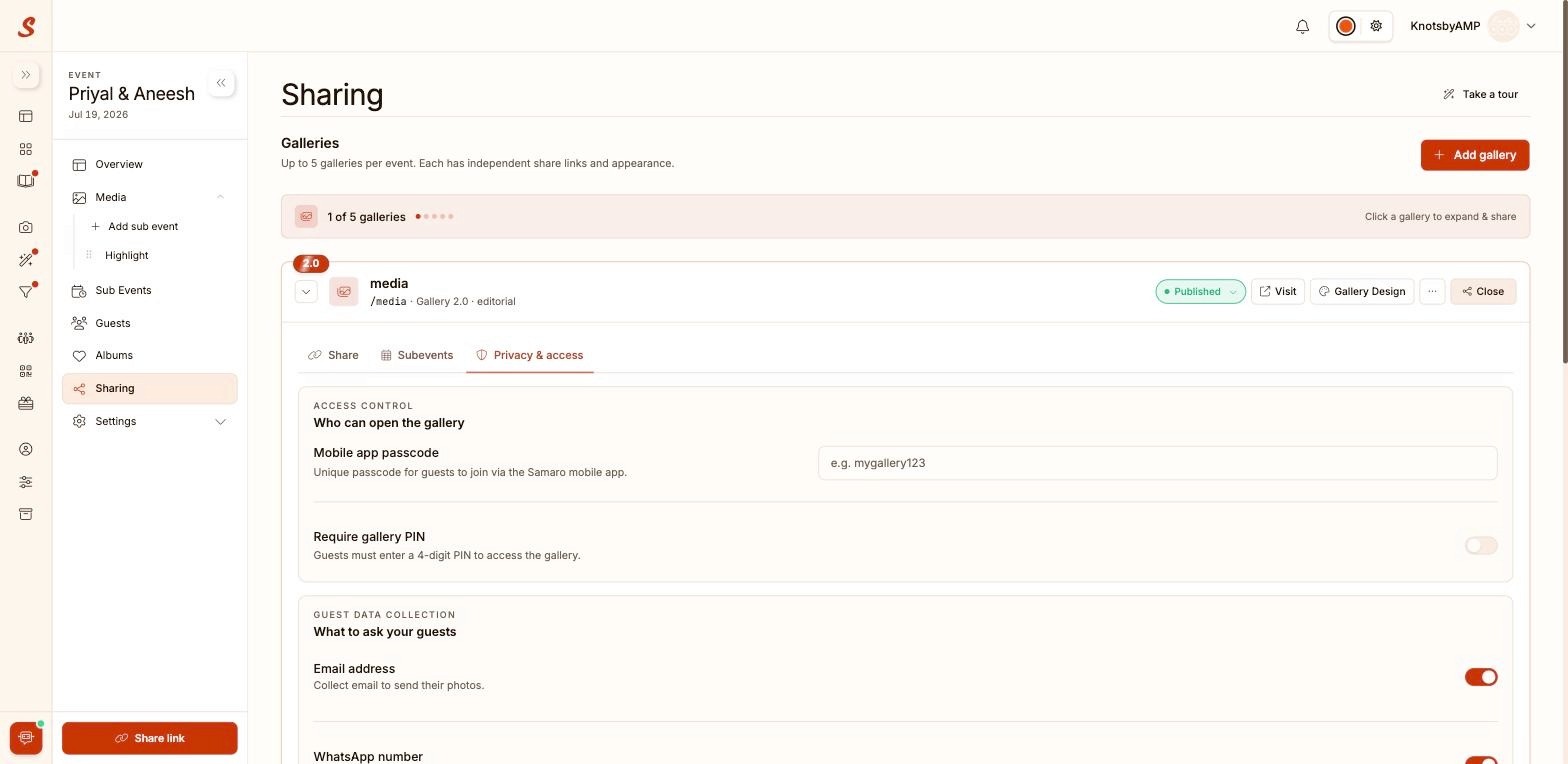
Click the Privacy & access tab. The Access Control section lets you set a mobile app passcode and toggle Require gallery PIN to gate the entire gallery.
Guest Data Collection controls whether guests must submit an email or WhatsApp number before accessing their photos.
Gallery Features toggles include Guest upload, Business enquiry, Language toggle, Allow local upload selfie, Require liveness check for selfie, and Guest favorites, giving you fine control over the guest experience and data collection.
Step 6: Design Your Gallery
Click Gallery Design to enter the 6-step designer. Step 1, Look & Feel, lets you choose an editorial template (Heirloom, Broadsheet, Atelier, Daylight, Imprint, Masthead, Bento, Pressed, Bloom) and set element shape (Rectangle, Rounded, Pill).
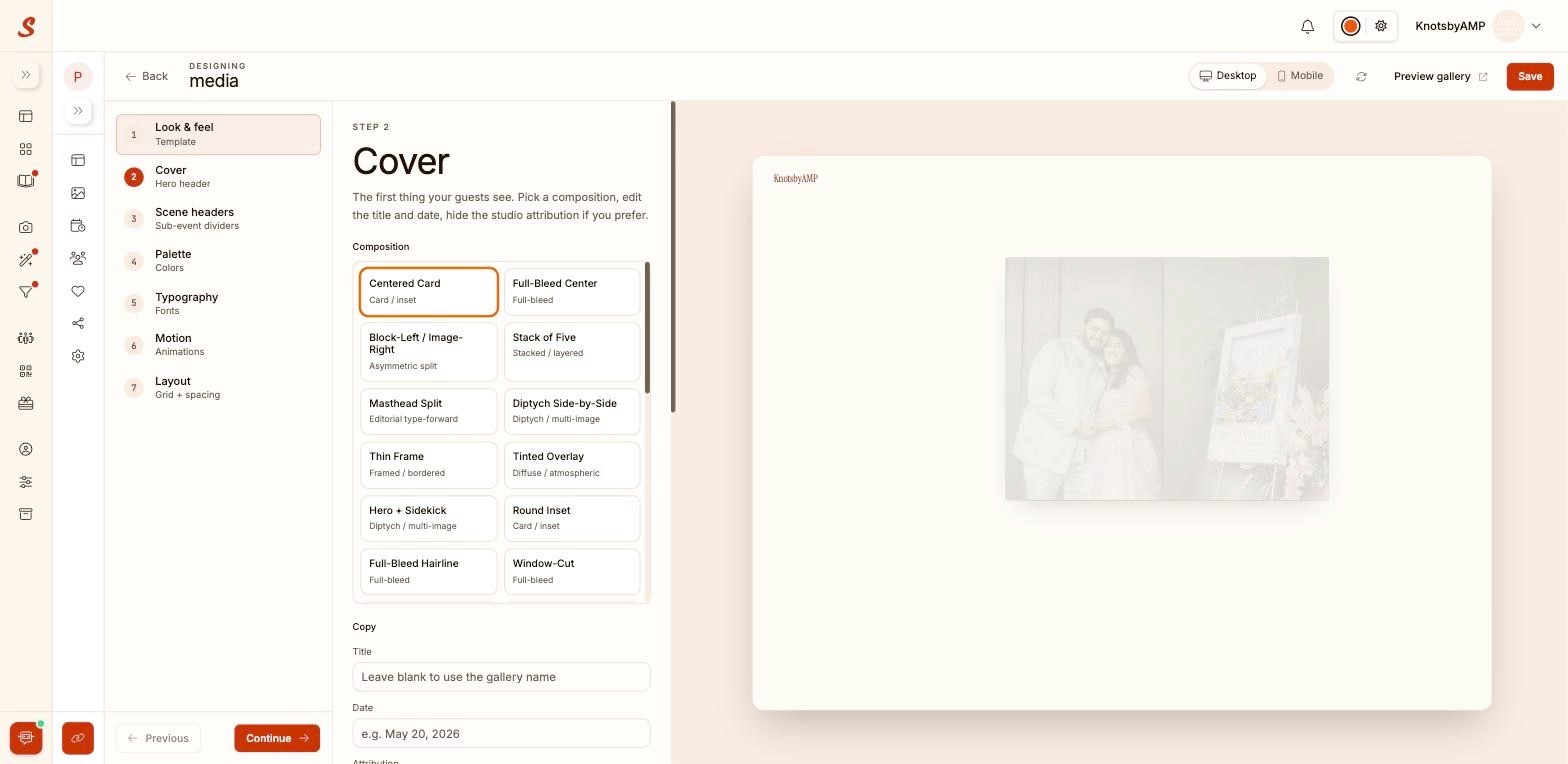
Step 2, Cover, lets you pick a hero composition (Centered Card, Full-Bleed Center, Block-Left, Stack of Five, Masthead Split, and more), then set the title, date, and attribution text shown to guests.
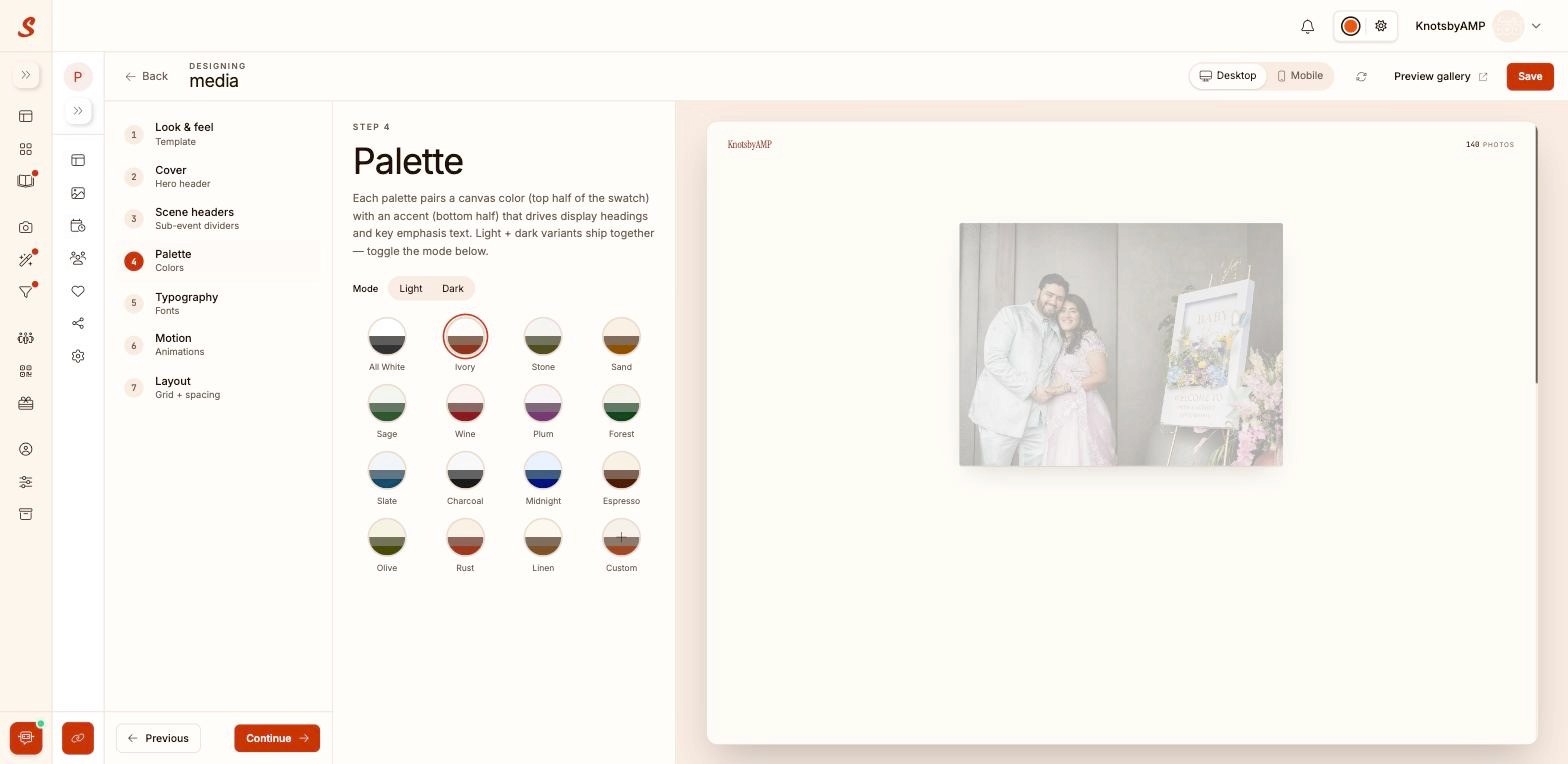
Step 3, Palette, offers curated light or dark color pairs (Ivory, Stone, Sage, Wine, Plum, Forest, Slate, Midnight, Rust, and more) or a custom option.
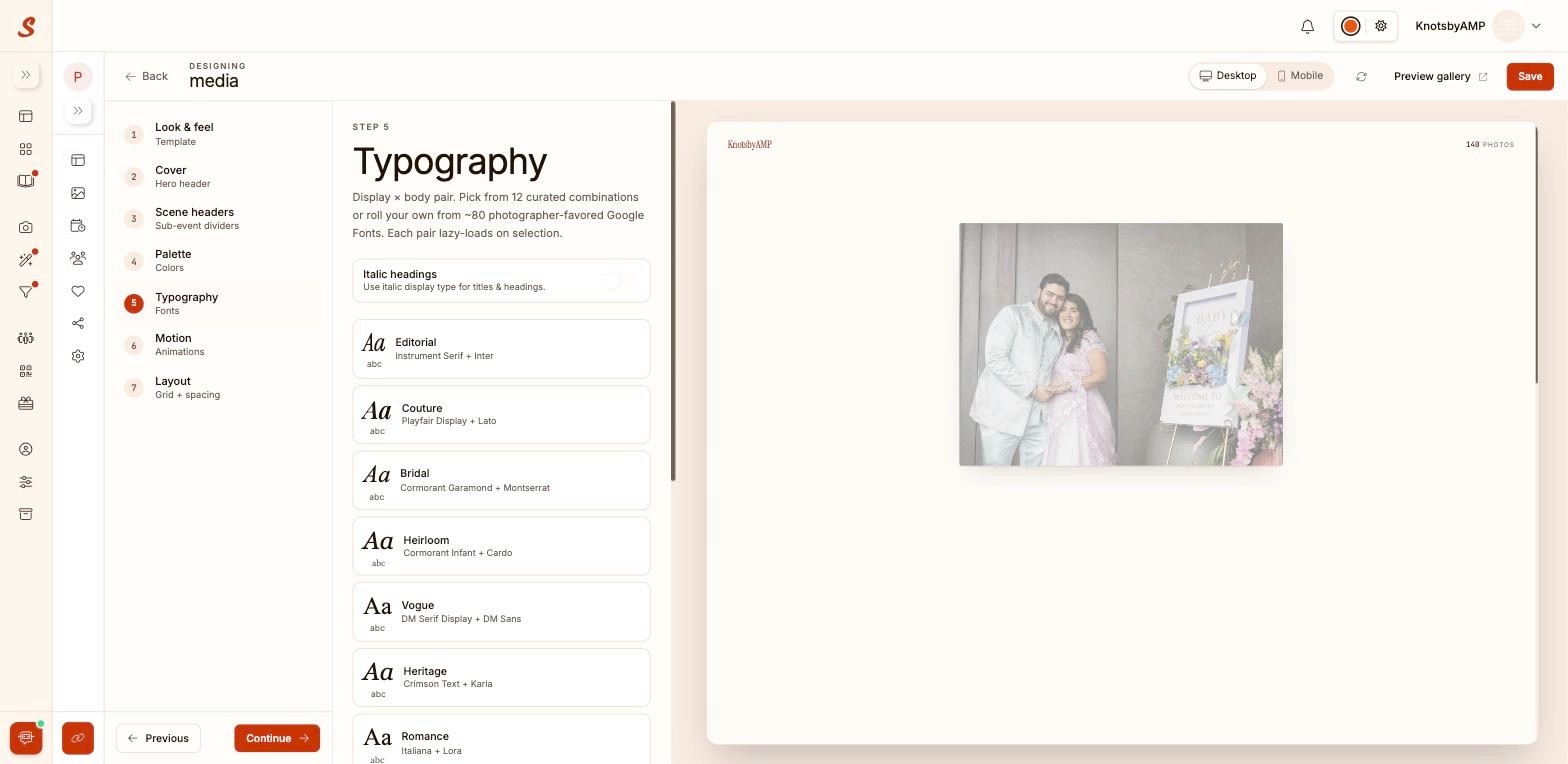
Step 4, Typography, lets you pick a display-and-body font pairing from 12 curated combinations (Editorial, Couture, Bridal, Heirloom, Vogue, Heritage, Romance, and more), with an option for italic headings.
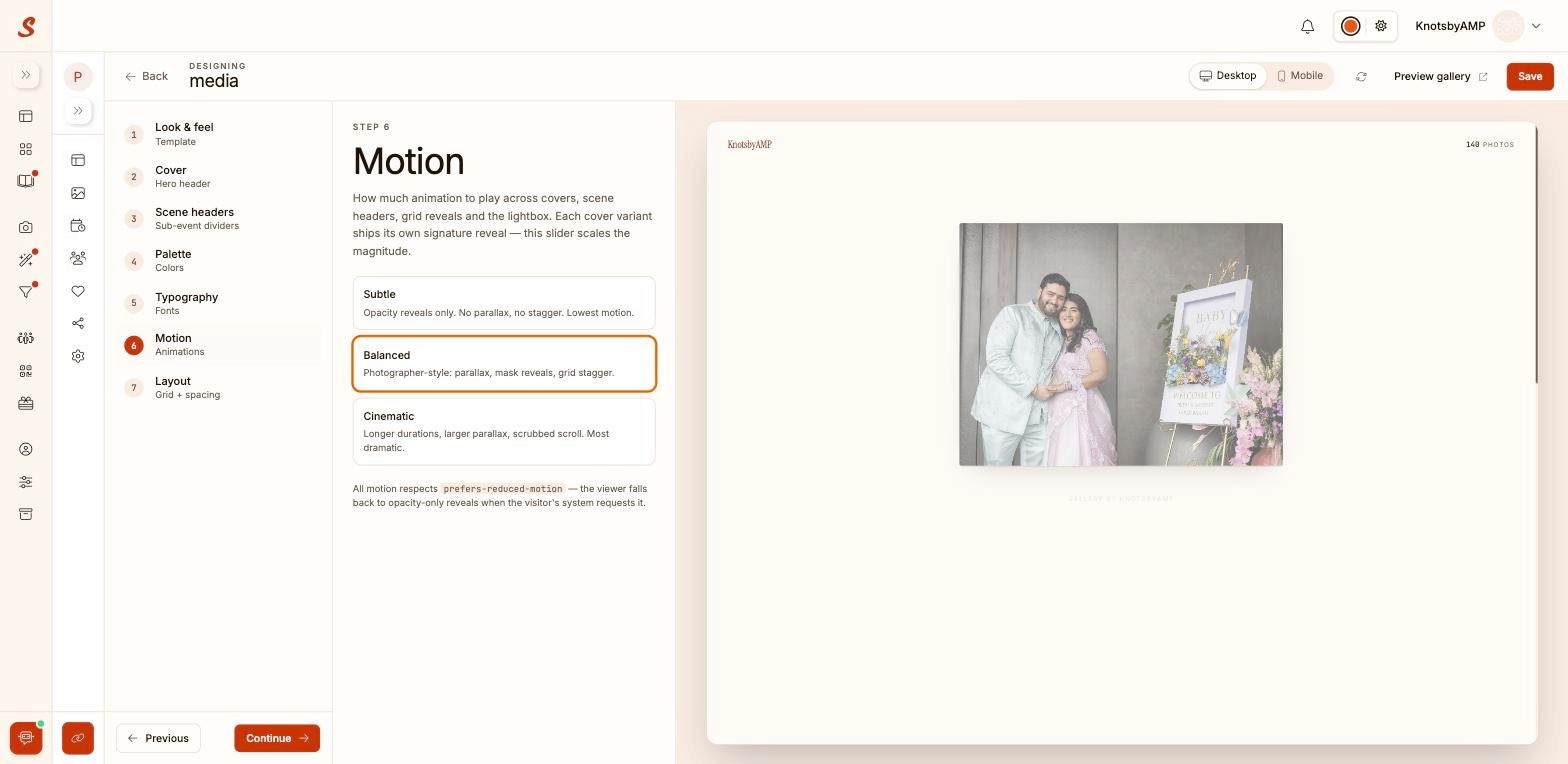
Step 5, Motion, sets the animation intensity: Subtle, Balanced, or Cinematic, governing parallax and reveal effects across covers and grid transitions.
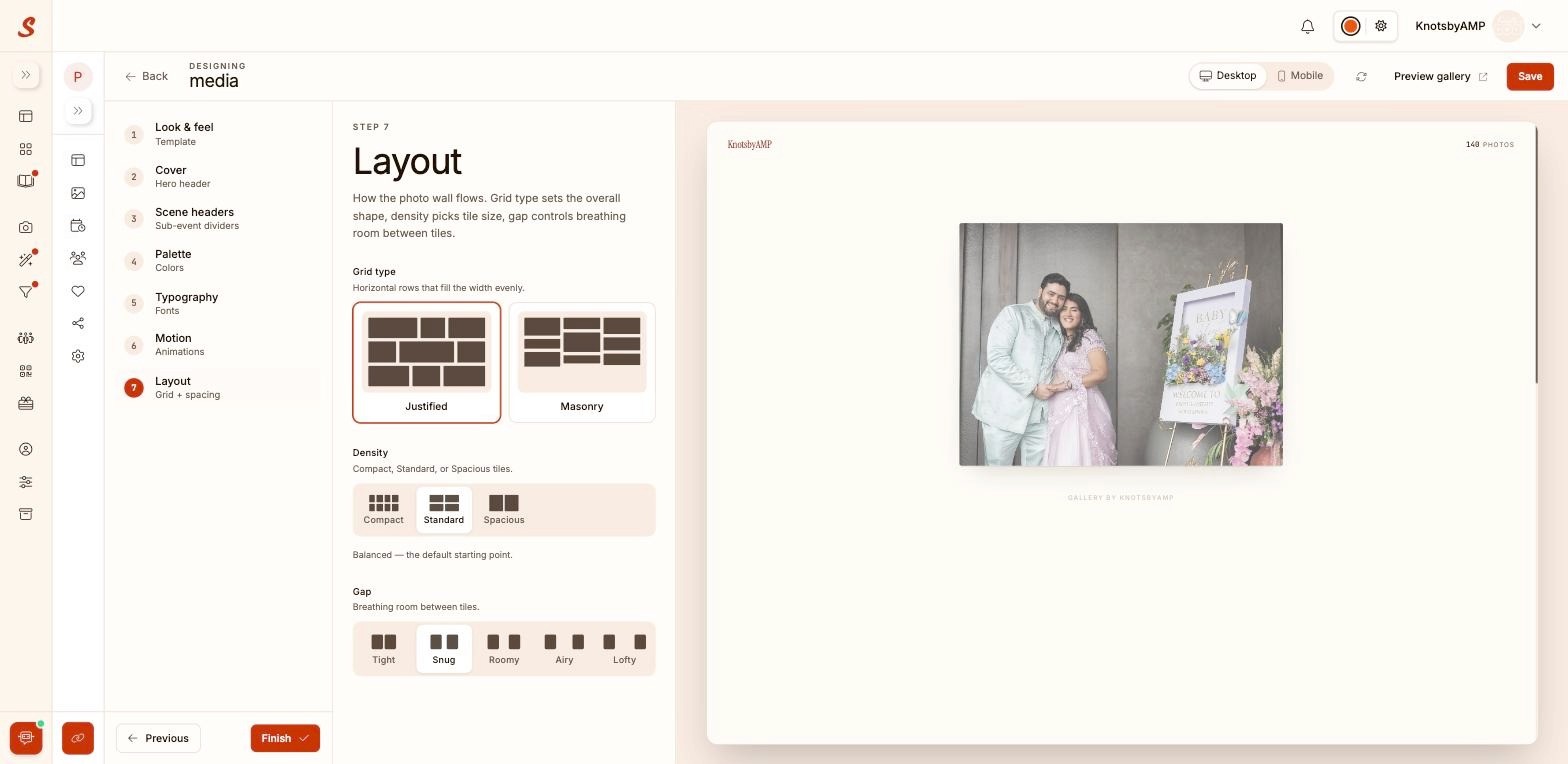
Step 6, Layout, sets the grid type (Justified or Masonry), density (Compact, Standard, Spacious), and gap spacing (Tight, Snug, Roomy, Airy, Lofty). Click Save once you’re happy with the live preview.

Step 7: Add Additional Galleries
Back on the Sharing page, click Add gallery to create up to four more galleries for the same event, each with its own audience type, privacy rules, and design, letting you tailor separate experiences (for example, one public link for general guests and another all-access link for close family).
Step 8: Control Download Quality and Media Privacy
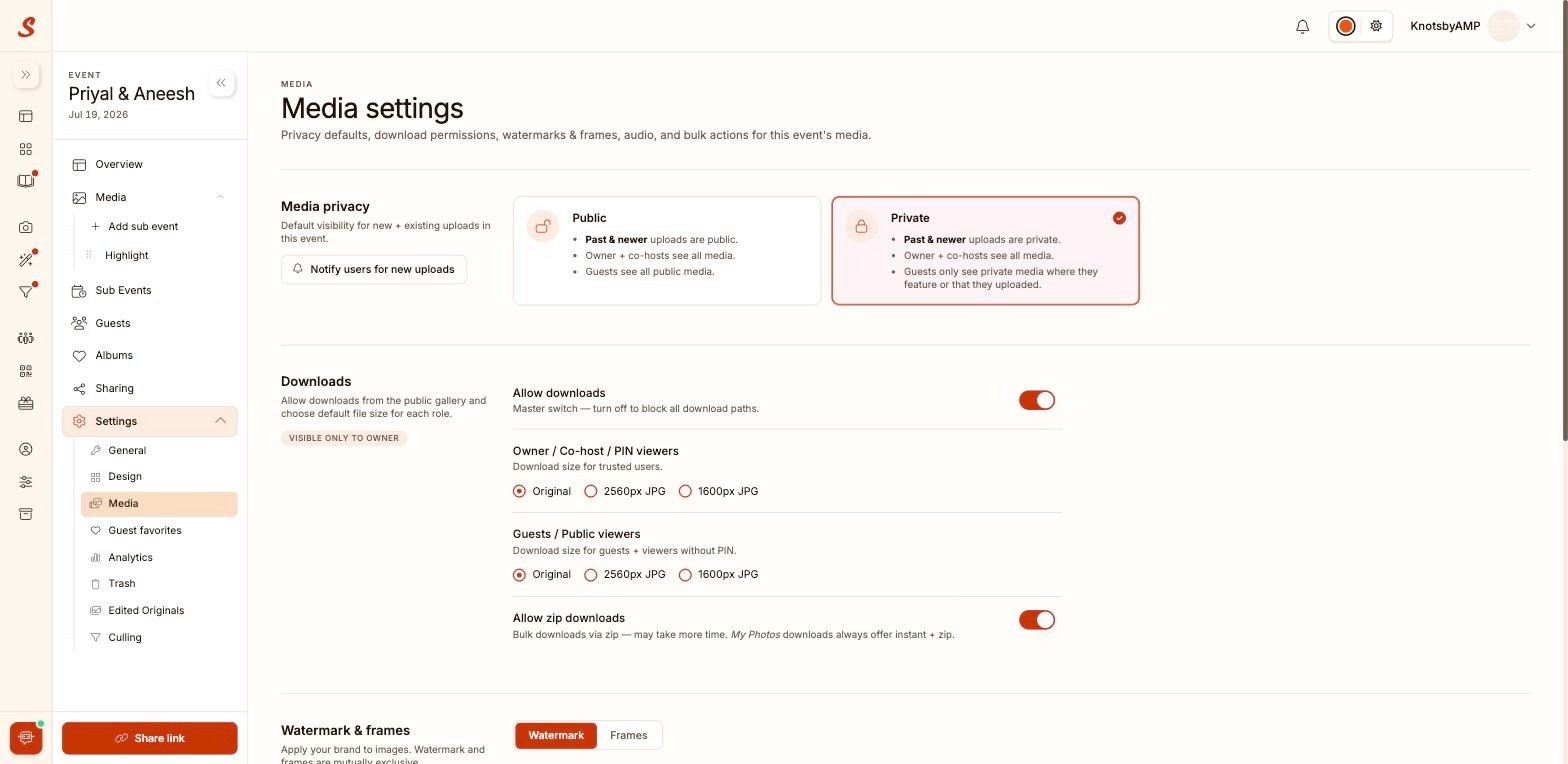
Go to Settings > Media in the event sidebar to set default media privacy, toggle Allow downloads as a master switch, and set download resolution (Original, 2560px JPG, or 1600px JPG) separately for owners/co-hosts versus guests. Enable Allow zip downloads for bulk downloading.
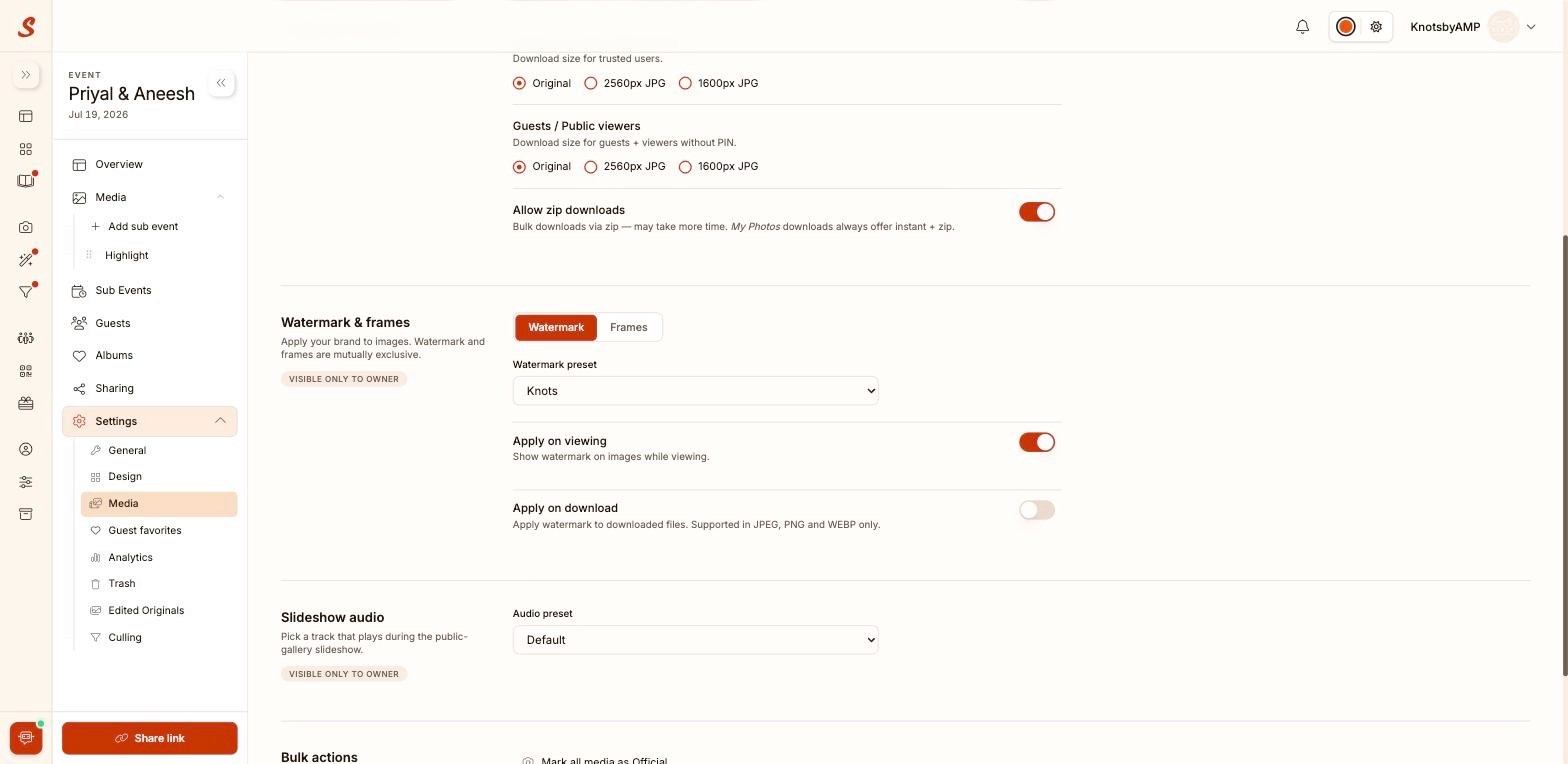
Further down the same page, Watermark & frames lets you pick a saved watermark preset and choose whether it applies on viewing, on download, or both.
Step 9: Upload New Watermark and Frame Presets
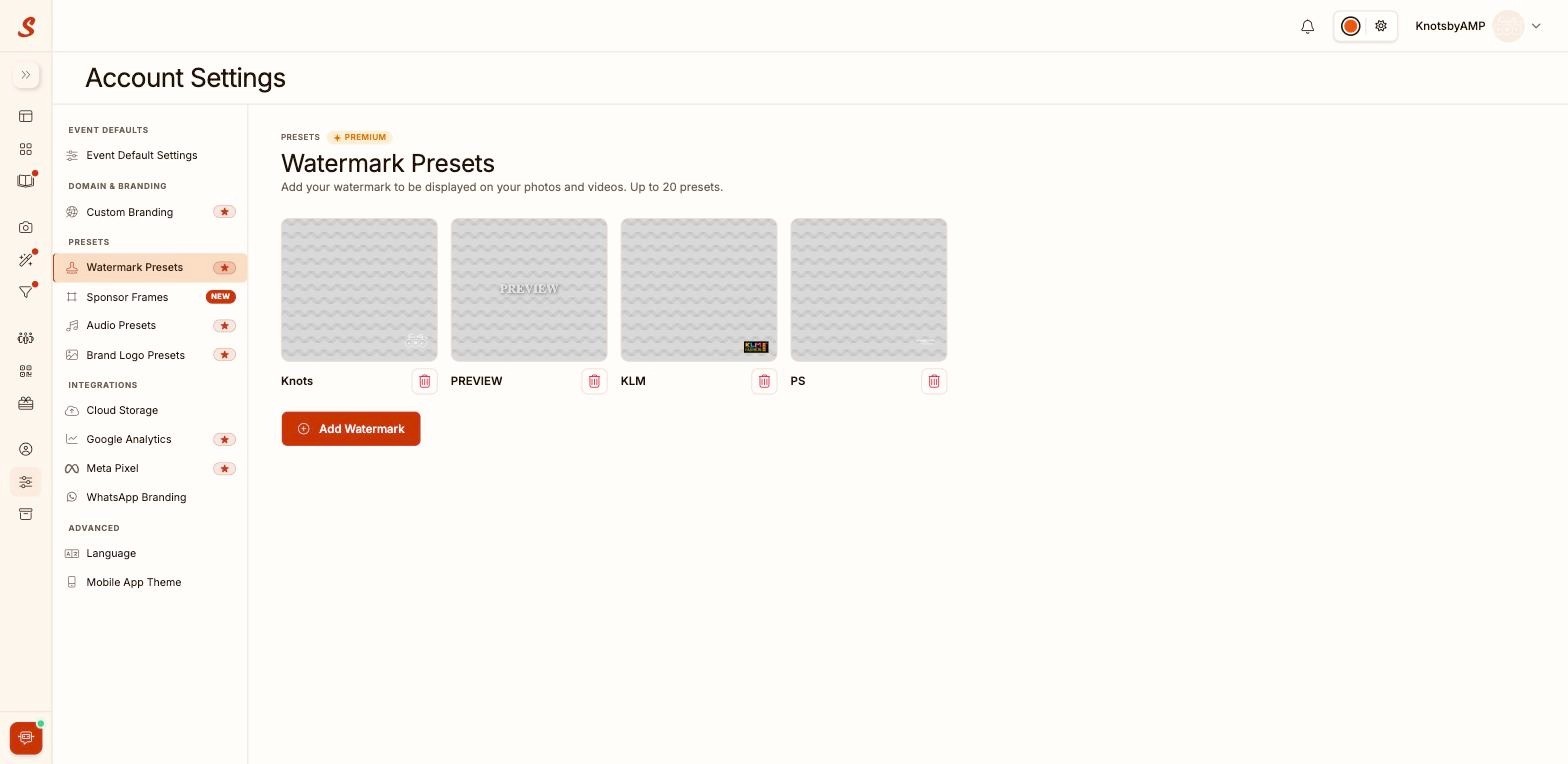
To add new branding assets, go to Account Settings > Watermark Presets, where you can upload up to 20 PNG watermarks (transparent backgrounds recommended).
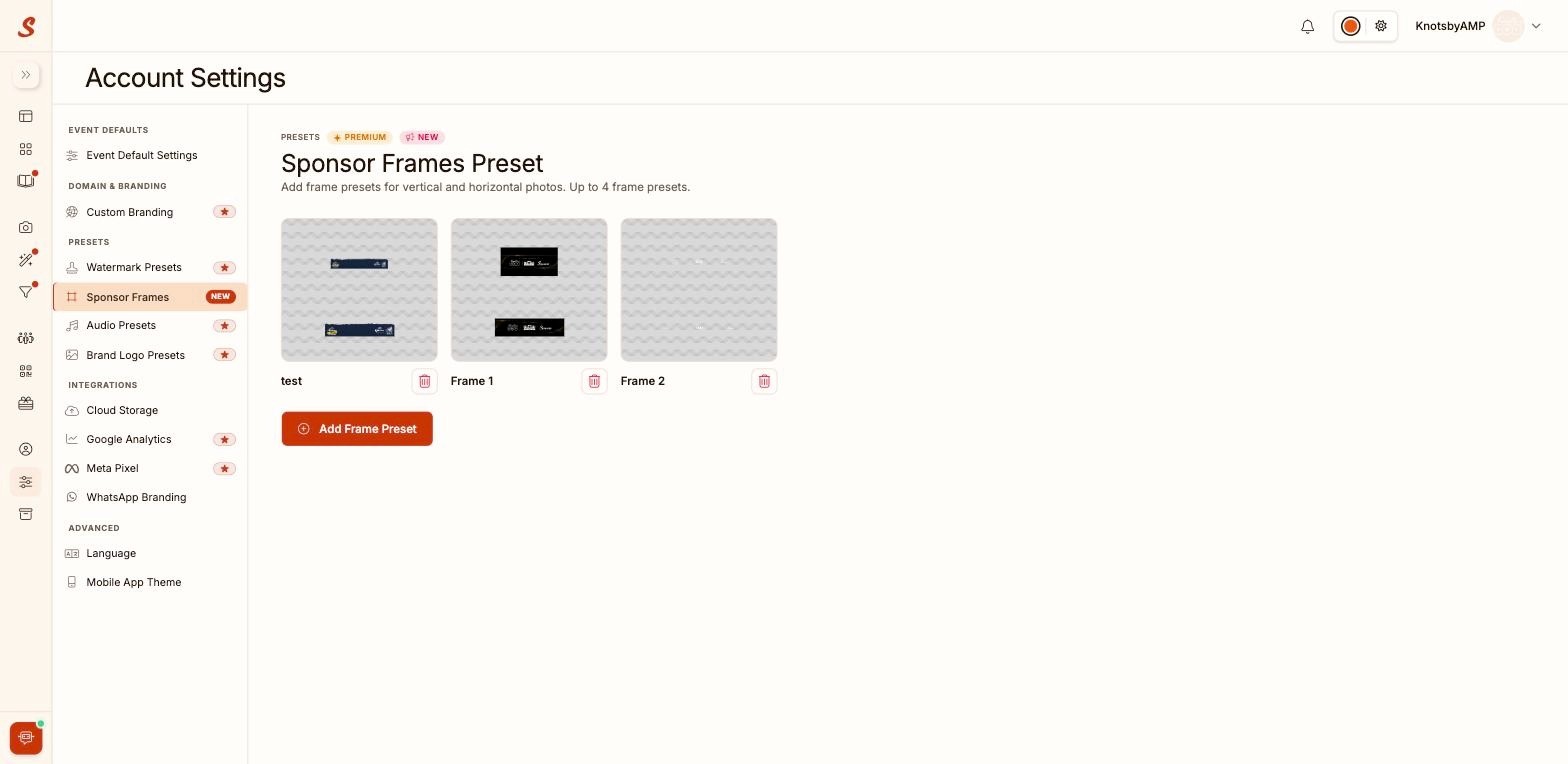
For sponsor branding, go to Account Settings > Sponsor Frames and upload up to 4 frame presets, each with separate vertical and horizontal versions.
Final Thoughts
With your privacy settings, sharing links, and design choices dialed in, your gallery setup is complete and ready to send to clients. Samaro’s layered structure means the same shoot can become several tailored experiences: a public link for general guests, a private link for immediate access only, and an all-access link for the people who should see everything.
Frequently Asked Questions
How to share photography galleries?
In Samaro, open your event and go to the Sharing tab, then choose an audience option from the dropdown — Public Gallery, Private Guest Access, All Access Gallery, or Mobile App — and share the generated link or QR code with your guests.
Can guests upload their photos?
Yes. Enable the Guest Upload toggle in the gallery feature settings, and guests can add their own photos directly to the shared gallery.
What are the key gallery customization features?
Key customization options include Cover, Palette, Typography, Motion, Layout, and Look & Feel, letting you control the hero image, color scheme, fonts, animation style, grid layout, and overall template design.
Can I secure specific photos with a PIN?
Yes. Turn on Require Gallery PIN in the Access Control settings to add a passcode that guests must enter before viewing the gallery.
Can I add sponsor logos to photos?
Yes. Go to Account Settings > Sponsor Frames Preset and upload vertical and horizontal sponsor frame designs, which can then be applied to your galleries.
How do I allow guests to download entire sets?
Enable the zip download toggle in Media Settings to let guests download the entire photo set in one file instead of individual images.
Guest/Host Login